After 4 years of troubleshooting, WEMO’s reliably powering my smart home
I’ve been using Belkin’s WEMO line of products since 2012, and in that time I’ve developed a love/hate (mostly hate) relationship with these things. You can read all about in my first article about WEMO devices – aptly named “Life with Belkin’s WEMO, a tale of broken promises” – but that was then, and this is… well, this is the dawn of a new age. One where WEMOs work, and my lights respond not only to the quick tap of an app, but also to the thunderous roar of my voice.
I promise, you too can whip your fickle WEMOs into shape.
All you have to do is follow this step-by-step, four-years-in-the-making guide…
Step 1: Build a solid home network
It doesn’t matter what smart home devices you are trying to install; if your home network is haphazardly implemented, you’re likely to encounter problems that will compound on each other as you attempt to add more smart devices to your network.
Lucky for you, I created a quick guide to optimizing your wireless network, so your own network infrastructure shouldn’t get in the way of creating the smart home of your dreams.
Step 2: Set up a dedicated wireless access point for your WEMOs
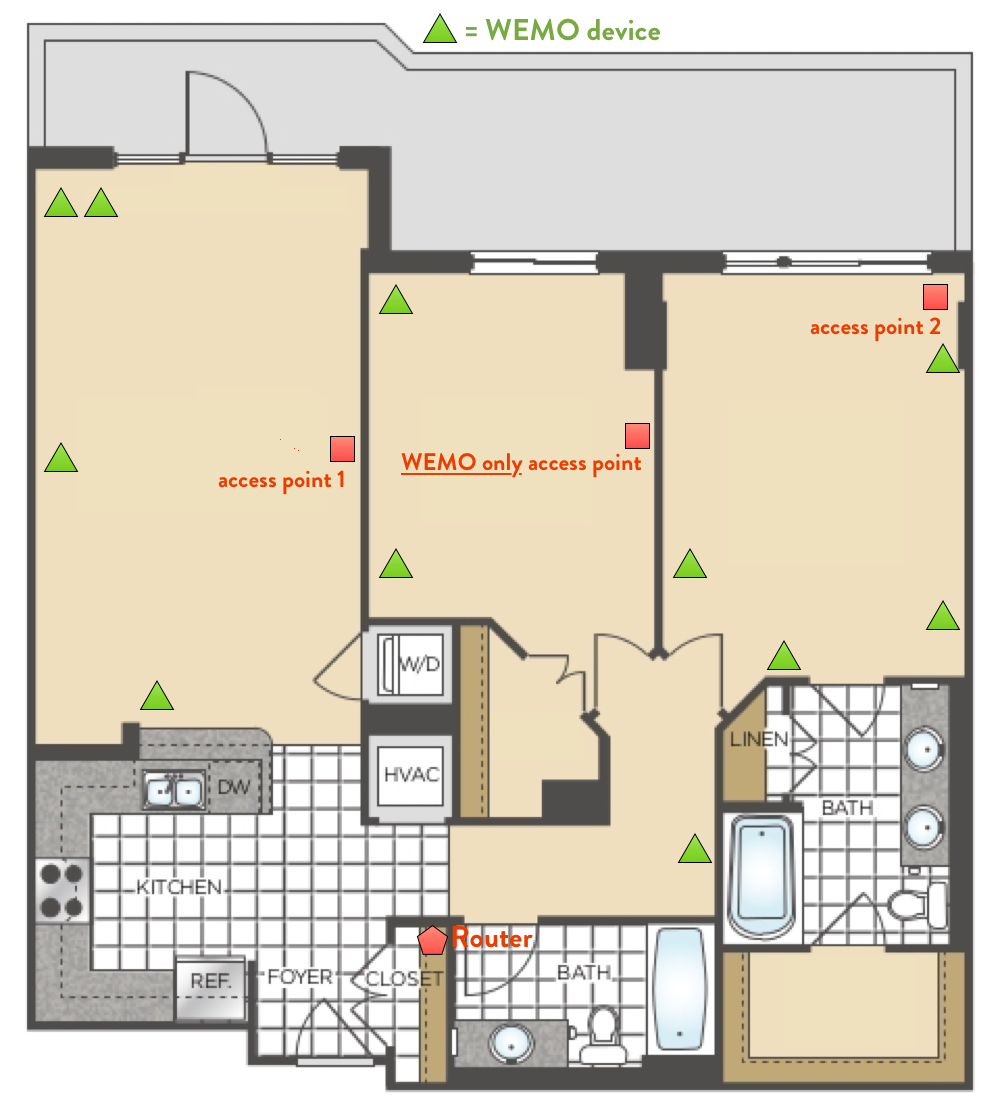
As the title of this article implies, I’ve tried just about every hack, trick, and voodoo spell available to get my WEMOs working reliably. In the end, though, what solved all of my WEMO issues – and what has kept my WEMOs working near perfectly for months – was setting up a dedicated SSID (wireless network name) and WAP (wireless access point) for them.

Centrally locating the dedicated access point ensured it would cover my entire apartment.
How did I end up discovering Step 2? I literally# tried everything else. For some time, it was a known issue WEMOs struggled to be discovered on networks that used multiple wireless access points, but Belkin claimed to fix that issue in a previous update years ago…
Regardless, to fully realize the benefits of Step 2, I did three things:
- I created a dedicated SSID named Bubba WEMO 2.4GHz that only my WEMOs use
- I set up a dedicated access point to broadcast that SSID
- I purchased a Belkin brand access point to eliminate any possibility of incompatibility
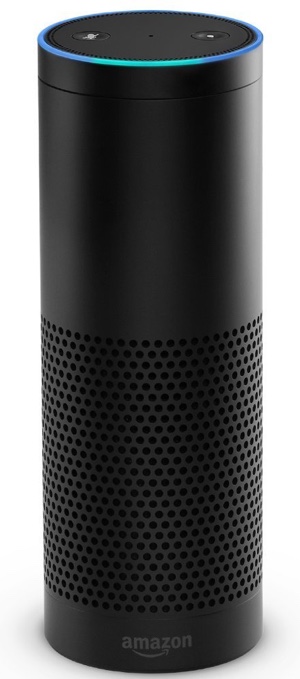
Step 3: Buy an Amazon Echo to control your WEMOs with voice commands
Controlling the lights in my house using only my voice has been something I dreamt about since I was a little boy (I had a weird childhood). But seriously, it’s not just cool to control your lights with your voice, it’s shockingly more reliable than using the official WEMO app. I’ve yet to write my review for the Amazon Echo, but let’s just say I liked it enough to buy two and an Amazon Echo Dot).
Now I can pretty much control my WEMO devices from any room, not to mention I can also play Pandora, Amazon Prime Music, check the news, check the weather, and make unnecessary tech purchases directly from Amazon – all just by using my voice.
Step 4: Manage your expectations
Even with these optimizations in place, my WEMOs still encounter minor hiccups from time to time. Still, it’s never anything that can’t be fixed by simply closing and reopening the app (which is generally the source of the issue).
Keep in mind, these are not high-end smart home devices like what you’d get from a company like Crestron. They’re gadgets, and nothing more.
BONUS TIP!
Belkin’s line of WEMO products are getting close to the end of their product life, so you can find them pretty cheap on Amazon. When paired with a Echo, they truly feel like you’re living in a smart home.
Submitted To Home Automation, Smart Devices, The Internet of Things
Like what you read? Share it.
(That helps us.)
Love what you read? Patronize Joe Corbett.
That helps us and the writer.
What is Patronizing? Learn more here.


