
do less...
[ This space intentionally left blank. ]
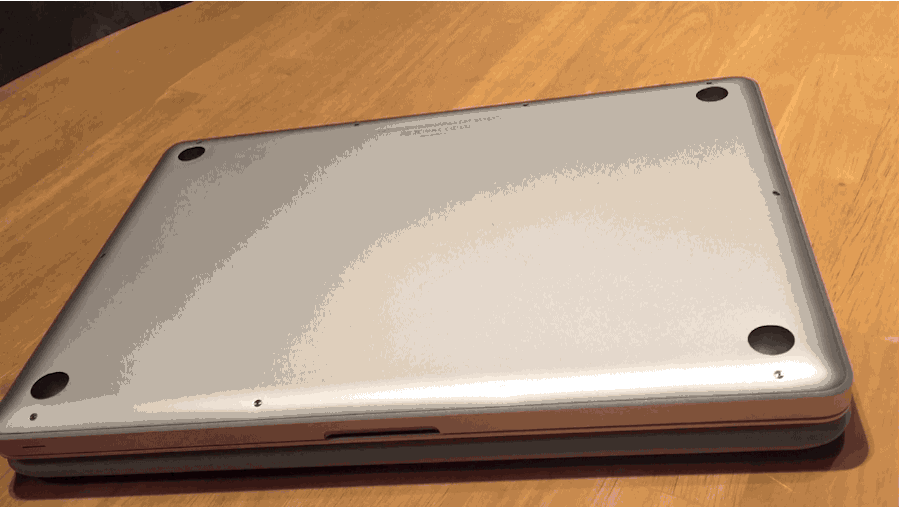
MacBook Pro Battery replacement in one simple GIF
All batteries have a shelf life, which means every single gadget you buy that comes equipped with a rechargeable battery will, over time, lose its ability to hold a charge until it’s completely useless. When your MacBook Pro battery is finally dead, your once-fancy laptop becomes an odd-looking desktop computer. So, rather then remain tethered to the wall the rest of your life, roll up your sleeves and replace that failed battery.
MacBook Pro Battery Replacement
When you finally decide your MacBook Pro battery is no longer performing well, replacing it is incredibly simple. So simple in fact that I’ll show you how to do it using only a gif. But first, you’ll need get your hands on a replacement battery, which is actually the most difficult part. Your best bet it to find one on Amazon that works with your model.
I’ve listed the three most common replacement batteries for a wide variety of 13″ and 15″ MacBook Pro models. Before you place your order, be absolutely certain your model is listed under compatible models for the battery you intend to buy. Installing the wrong battery will ruin your day and your computer.
- Battery for 13″ MacBook Pro: Mid 2009 – Mid 2012
- Battery for 15″ Macbook Pro: Mid 2009 – Mid 2010
- Battery for 15″ Macbook Pro: Early 2011 – Mid 2012
Once you have your battery, grab your Philips #0 screwdriver and the tri-wing screwdriver that should come with your new battery and get to work.
For those of you that hate gifs…
- With your computer powered down, remove the bottom lid of your computer
- Remove the tri-wing screws securing the battery to your computer and detach the power cable from the logic board
- Remove the old battery and put the new one in place
- Secure the battery with the tri-wing screws and attach the battery to the logic board
- Screw the bottom lid back into place and fully charge your battery
Keep an eye on the health of your new battery
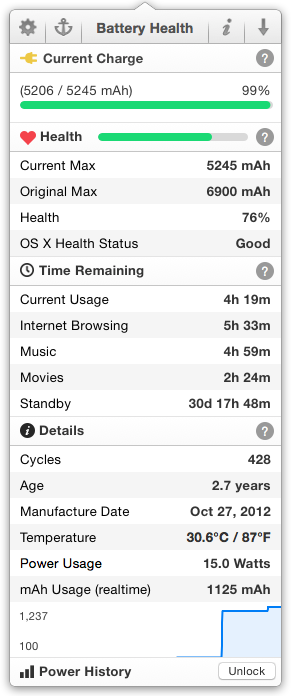 There are a lot of great 3rd party battery utilities in the App Store that provide a wealth of additional information about your MacBook Pro’s energy consumption and corresponding battery health. My favorite, however, is Battery Health by FIPLAB Ltd.
Battery Health, as the name implies, gives a detailed look at the health of your MacBook Pro battery and compares its current performance against its original condition when you first bought it. While the app is completely free, there is an option to pay $4.99 to unlock the full power history of your computer (since installing the app), a feature that is probably only useful for road warriors that really need to push their battery to the limit.
Calibrate your battery
Battery Health also comes with a clearly-outlined process for recalibrating your battery to ensure your computer is reporting the charge level accurately and the battery itself is making the most of its usable cells (the place energy is stored). That calibration list is as follows:
Perform this calibration every 6months or as needed
UPDATE: A fan of the site let us know that Apple officially calls for a battery calibration every month and even provides a link that adds a reminder directly to your calendar found here.
- Fully charge your MacBook.
- Once fully charged, leave it plugged in for at least another 2 hours.
- Remove the MagSafe power adapter, and use your computer until you get the battery level warning message.
- Ignore that message and keep running your notebook.
- Eventually the machine will go to sleep.
- Do NOT plug it in. Instead, let it sleep for at least 5 hours.
- After the time has passed, plug it back in, and let it fully charge.
- Once fully charged, your battery has been properly calibrated.
While I’m a big fan of the latest and greatest technology, I’m also equally as into extending the life of my gadgets, or at least getting them ready for their next user. Keeping your gadgets functional and lengthening your upgrade cycle will save you a lot of money in the long run, and you’ll feel good knowing that your slowing down the rising tide of consumer electronic waste.
Submitted To Apple, Guide, OS X

Like what you read? Share it.
(That helps us.)
Love what you read? Patronize Joe Corbett.
That helps us and the writer.
What is Patronizing? Learn more here.