Execute ‘sudo trimforce enable’ to keep your SSD healthy
According to Ars Technica, Apple’s release of OS X 10.10.4 not only brought us much needed stability updates via the removal of the system process ‘Discoveryd’, it finally gave us a simple command line to enable TRIM# support for systems using 3rd party SSDs.
Previously OS X only allowed TRIM support on OEM drives, so those of us with older system that upgraded to a Solid State Drive later were doomed to eventually see that speedy drive slow down and possibly become corrupted over time.
Enabling TRIM support is extremely simple:
- Always back up when making any changes to your system’s hardware configuration
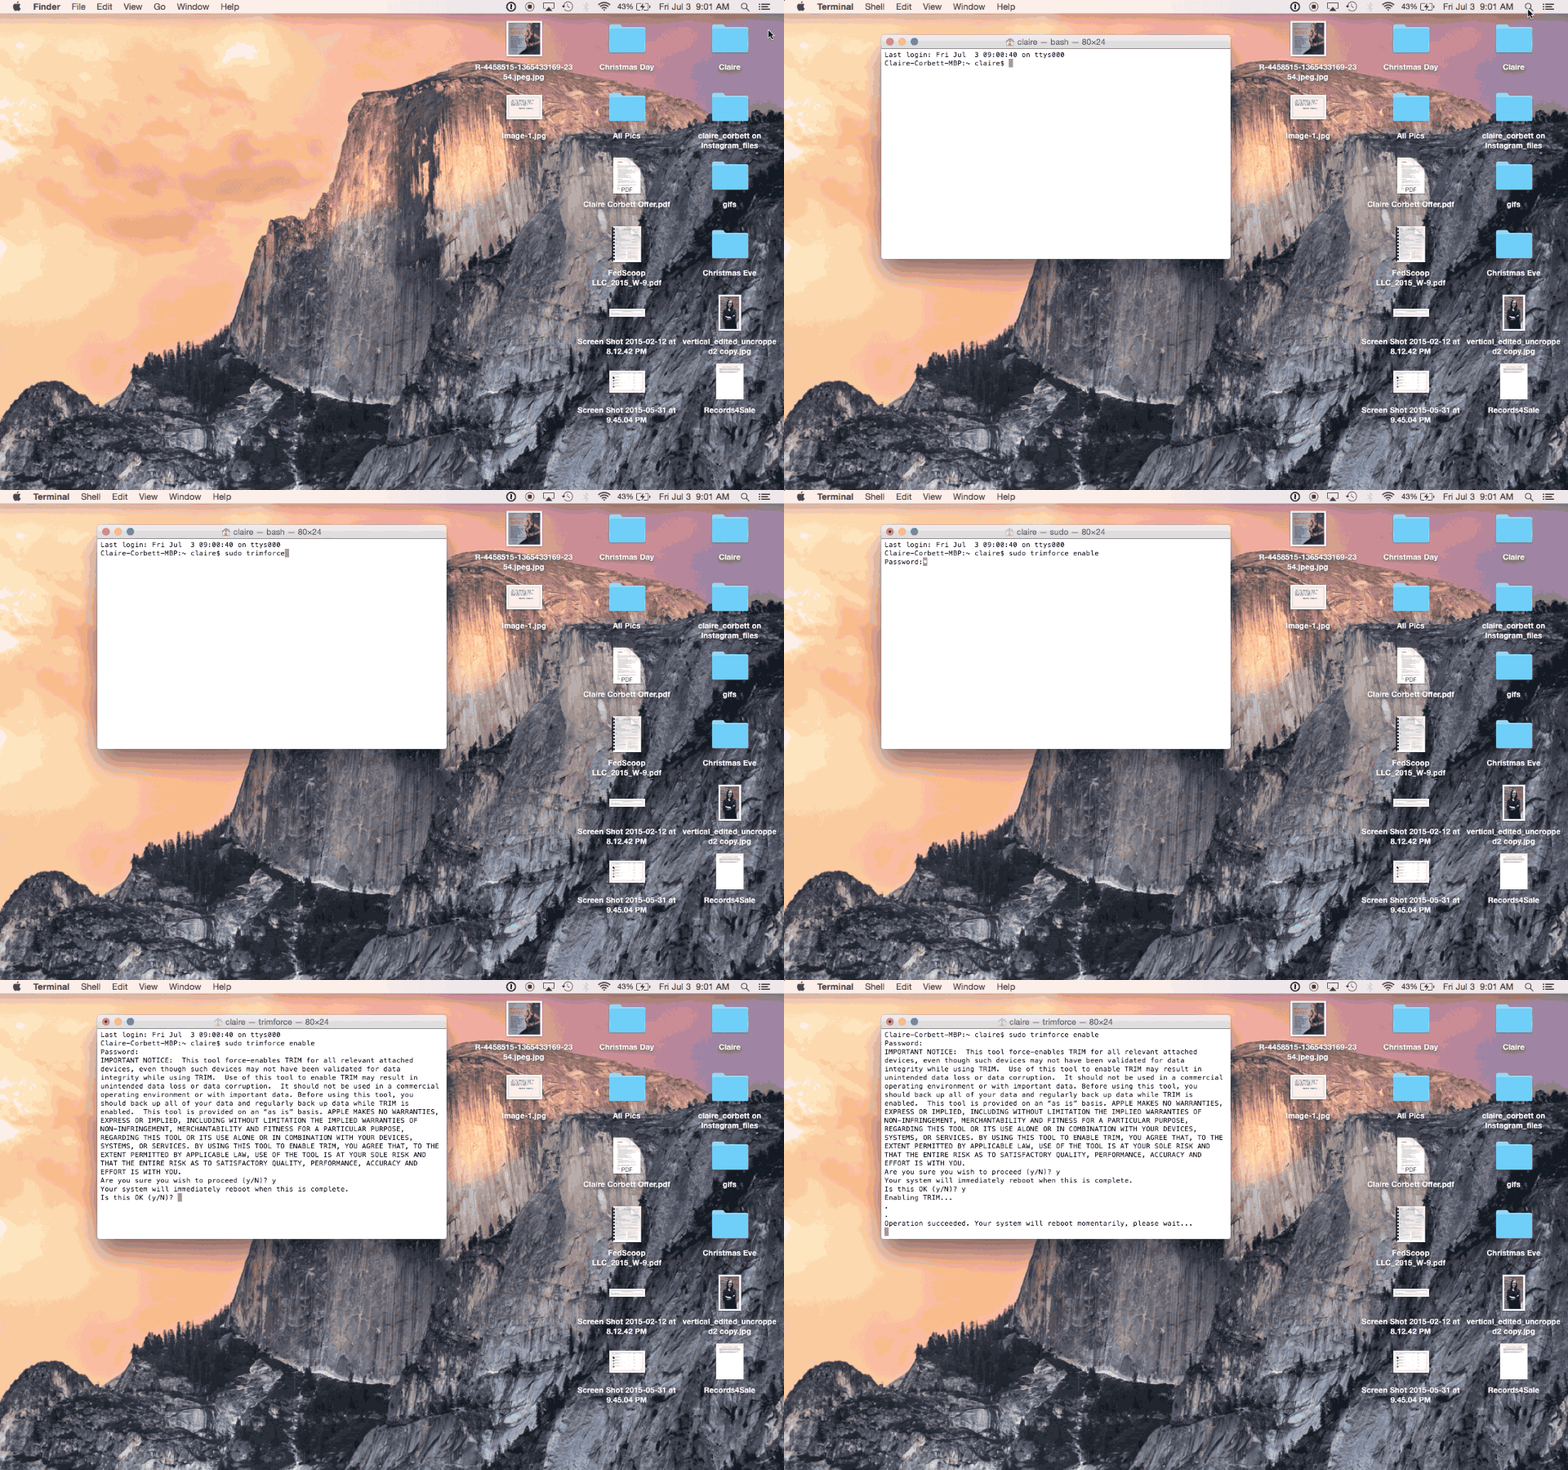
- Open Spotlight (the magnifying glass in the upper right corner), type ‘Terminal’, press Enter
- Copy and Paste the following command: sudo trimforce enable
- Choose ‘Yes’ for all prompts, and your system will reboot shortly

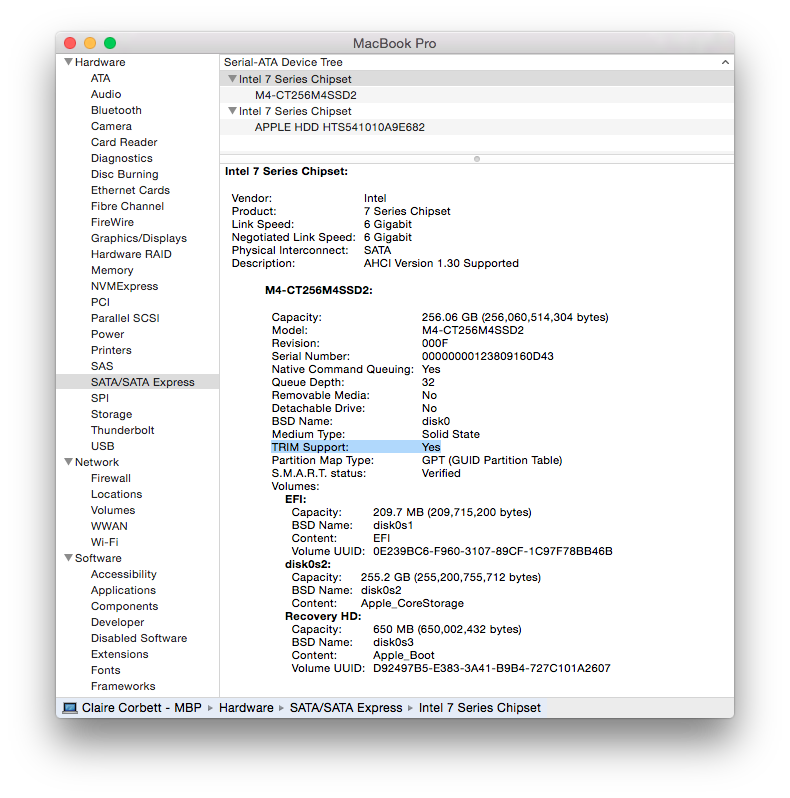
You can verify that TRIM Support is now running by opening the system report and seeing for yourself. Click > About This Mac > System Report > SATA/SATA Express

That’s it! Pretty simple process for enabling something so important.
Also, I should note that if you’re a super power user like me and you’ve installed two SSDs in your MacBook Pro and setup up a striped RAID, TRIM will work as expected and keep your RAID running smoothly.
Like what you read? Share it.
(That helps us.)
Love what you read? Patronize Joe Corbett.
That helps us and the writer.
What is Patronizing? Learn more here.


